Dream Catchers are not only a beautiful home decor piece-they stem from rich Native American traditions. The traditional dream catcher was intended to protect the sleeping individual from negative dreams, while letting positive dreams through. The positive dreams would slip through the hole in the center of the dream catcher, and glide down the feathers to the sleeping person below. The negative dreams would get caught up in the web, and expire when the first rays of the sun struck them. One element of the dream catcher is the loop. The hoop symbolized strength and unity which is held to a high esteem by some Native Americans of North America.
This beautiful piece of art will look stunning in your home, bedroom or even dorm room!
We want to share one of our favorite tutorials that we discovered! You can find the step-by-step tutorial at Patternrevolution.com.
There are several different ways to make a dream catcher. The basics you will need are:
- Fabric scraps
- Extra trims
- Scissors
- Embroidery floss
- Embroidery needle
- Brass macrame ring (hoop)
- Doily* (These will stretch when you attach them, so make sure it is smaller than your ring.)
- Fabric glue
- Beads and feathers (optional)
Step 1: Pick out all of your fabric, your doily, and supplies.
Once you have your fabric and detailing picked out you want to wrap your hoop.
Step 2: Wrap your ring
Pick out one or two of the strips you want to use around the ring. If you are doing one of the bigger sizes, you will need two to cover the whole thing.
Take your strip and glue it to your ring at an angle. After it dries, just start wrapping it around the ring. When you are done, just glue it down. There is no right or wrong way to do this part. You can even use other materials instead of fabric.
Step 3: Putting in your center.
This is probably the hardest step. Get your doily, embroidery floss, and needle. I like doing this on a flat surface to start it, but then you can totally just do this step on the couch or chair or whatever.
Place your doily in the center of the ring. Take your floss and thread in through the needle. Tie the end of the floss to the ring, but use a knot that you can untie at the end. Start “sewing” it onto the loop. This is sort of like a whip stitch. It is up to you how you want the stitches spaced out. I like to do it on each petal.
Remember your doily is going to stretch so make sure you pull your floss tight enough! When you finish it up, there is a little wiggle room so even it out. At the end, take the part that is tied to the loop and untie it. After that, tie it to the other end of the string.
Step 4: Decorate
Take that awesome pile of fabric strips and lace trims, ribbons, etc. and get ready to attach them! Take a strip and fold it in half. Loop it around the ring.
Put all your fabric pieces on first. After you get your fabric strips on, add in your trims and lace. This is where your creativity will shine through. Add in different laces and ribbons for texture. Once they are all attached, you can cut the fabric pieces at an angle.
Step 5: Add extras
Now is the time to add the optional beads or feathers!
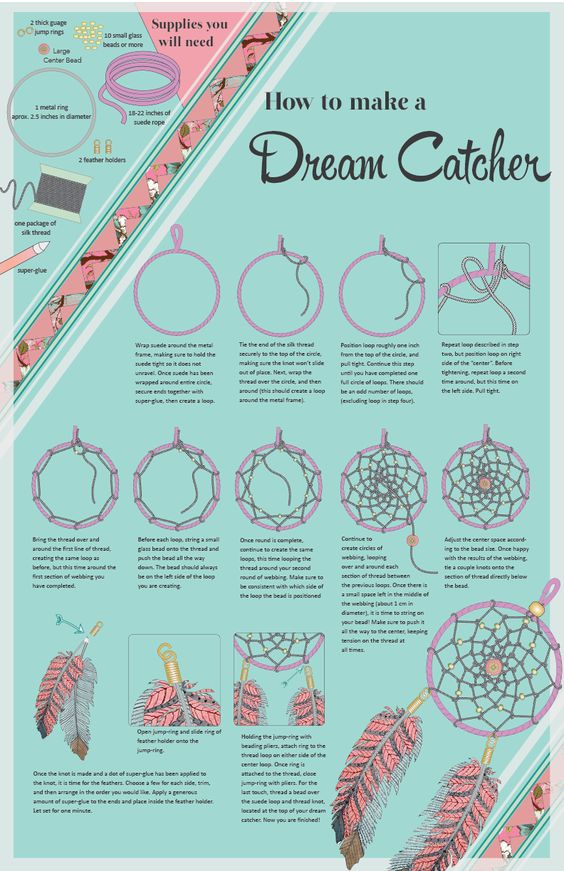
The below picture shows a step-by-step way to create a basic dream catcher.
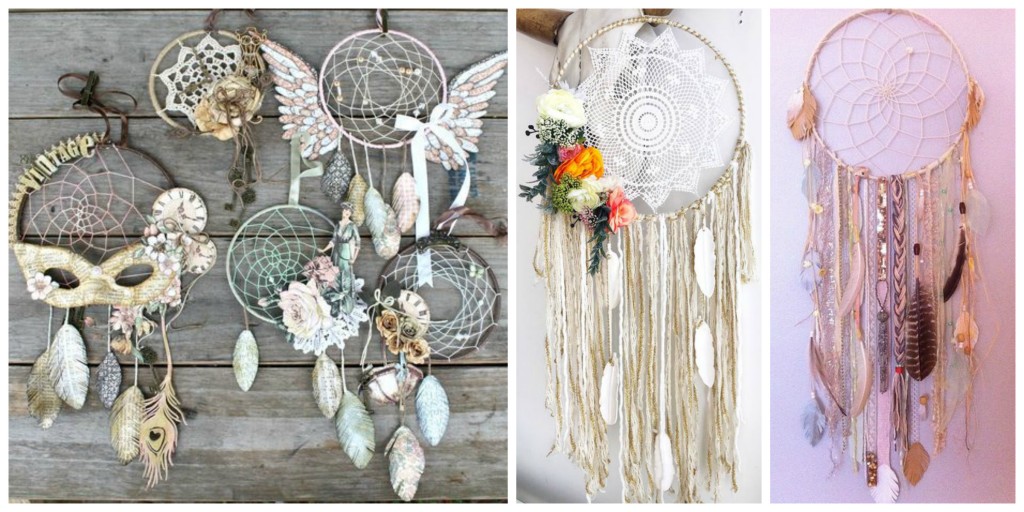
Need some inspiration?? Here are some of our favorites we pinned on our board: “Do It Yourself.”
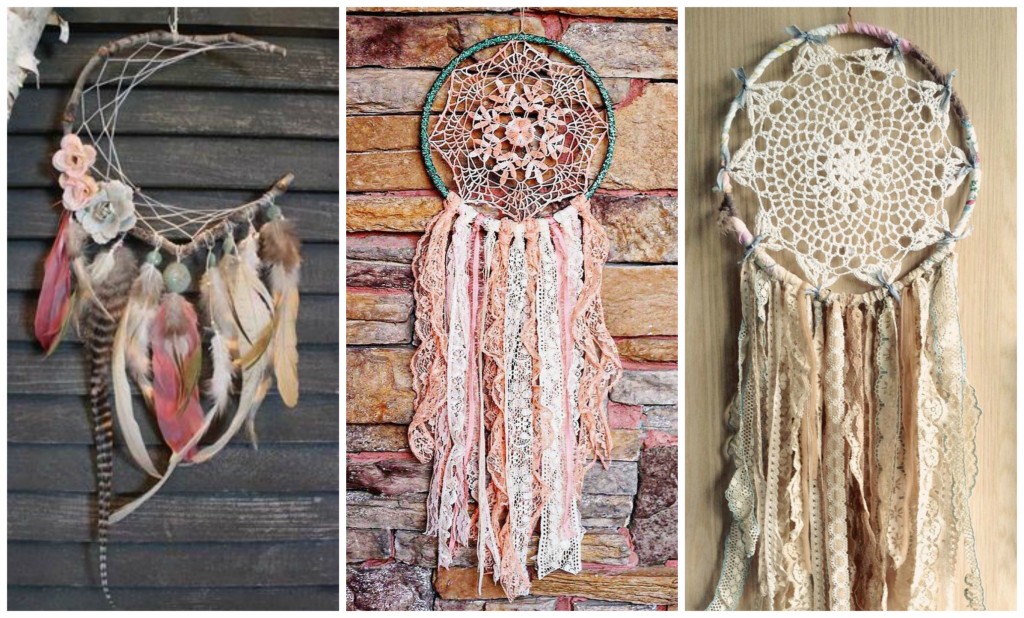
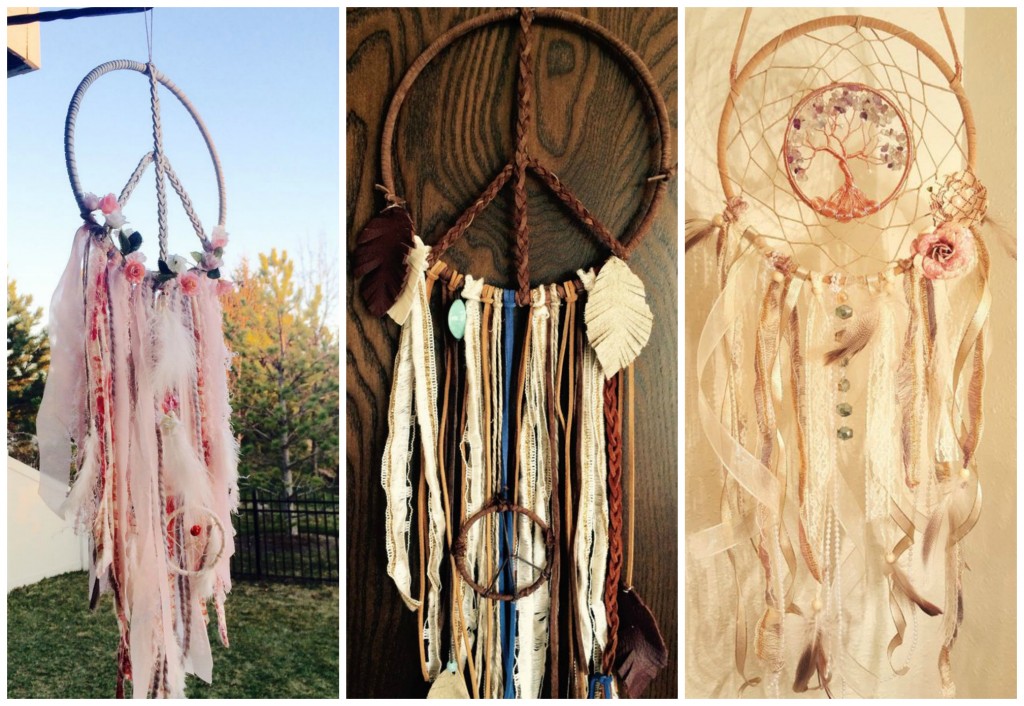
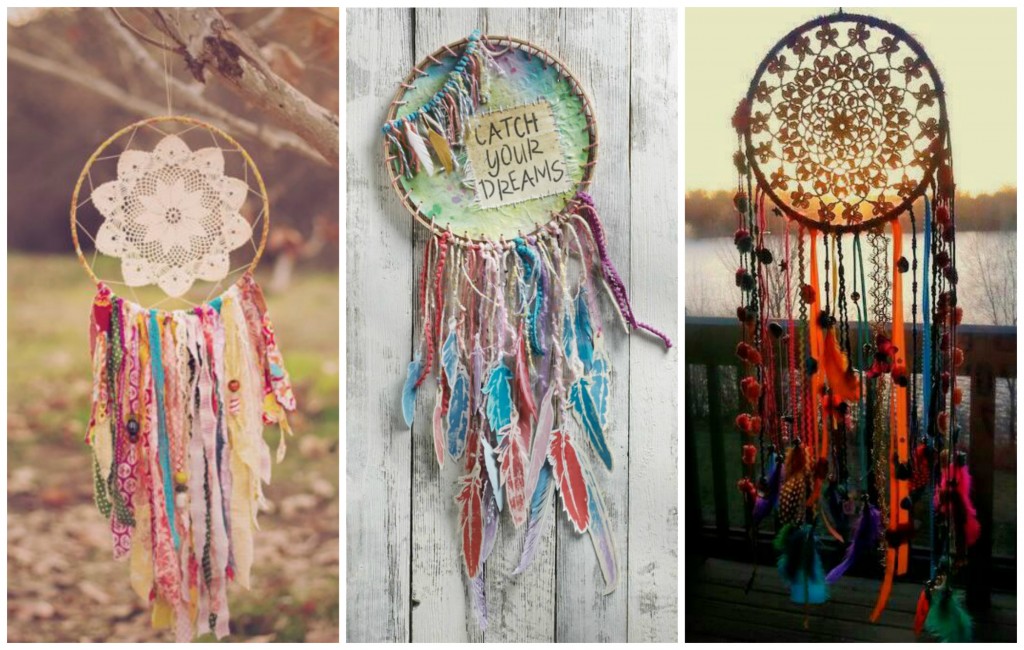
We love all the different styles! From flowers, to feathers, to crystals–you can create a dream catcher specifically to your style. This project is such a fun and inspiring concept. If you do create a dream catcher-Be sure to tag @shoplilyboutique on Instagram. We’d love to see your beautiful creations!
Also, check out all our bohemian inspired dresses at Lily Boutique!
Leave a Reply